When remote imaging, like here at UDRO, monitoring your setup is an essential part of keeping everything working properly. Today, with our advanced equipment, most of the issues a setup could run into are handled and taken care of by software, but it is still a good thing to check in regularly. Today I would like to overview a few plugins in NINA that make keeping track of remote telescopes easier than ever. All of these plugins fall into the category of remote monitoring, and let you keep track of important data over many nights.
1. Point3D
Point3D is a plugin that shows you a 3d model of your system, showing where it is pointing and how the mount is oriented. There are many mount control softwares that show this as well, but this model is integrated into your NINA Imaging tab, allowing for easy reference during the night. Understanding how your mount is oriented is important to equipment safety, as you can easily see if a slew is going astray. For mounts with encoders, having such a reference is not as important, but for those of us using standard astrophotography mounts, lacking encoders and a homing function, it is very helpful, and will keep your mind at ease. Most of us have a security camera looking at our telescope, but when the moon is down, it can be very hard to see. The plugin is refreshingly simple. After you install the plugin on the NINA plugin page and restart NINA, you can select it in the imaging tab, and put it where you want in your layout. It should now accurately display your telescope’s pointing. In the plugin page, you can change the type of telescope displayed and its color. You can also offset the pointing if it is not exactly right after install. One note is that the plugin will show you where the mount thinks it is. If you are running a mount without encoders, and it gets confused (thinks it’s in one position when it’s actually in another) the Point3D model will not be accurate.
2. Ground Station and StarMessenger
These two plugins, Ground Station and StarMessenger, work together to give you information after each exposure, and to alert you to any problems. I have both these plugins using Pushover, which unfortunately does come with a one-time fee, but these plugins let me sleep at night, and let me monitor my system completely from my phone. The first step is to install the two plugins and install Pushover on your phone, and create an account. Once you have a Pushover account you can get a Pushover API token and user key for NINA. These let NINA through Ground Station send you Pushover notifications. You will need to configure a few more settings on the Pushover website, but the process is quite intuitive (and more information can be found at https://daleghent.com/ground-station). Pushover is not the only option (there are many), but I have found it to be incredibly effective. Now, in the sequence you can add the “Failures to Pushover” trigger. I have the “priority” set to Emergency, and the “sound” set to Siren. If any instruction fails in my sequence, I will get a loud notification that will alert me to the problem. In addition to being notified when a problem occurs, you can have NINA send you messages at certain points in the sequence. For example, the setup sends me a notification after the roof opens, and at the very end of my sequence, when the telescope is parked.
Now let’s get to the other part, StarMessenger. This plugin will send you information of your choice along with a jpeg of the exposure. It will also send everything through Pushover, so if you already have it configured, it’s as easy as installing the plugin, putting in your API token and user key, and adding its trigger to your sequence. The trigger is called “StarMessage via Pushover after Exposure” and I have it configured to send information after every exposure, but you can change this interval based on your preferences. A standard message from StarMessenger will look something like this depending on how much information you want:
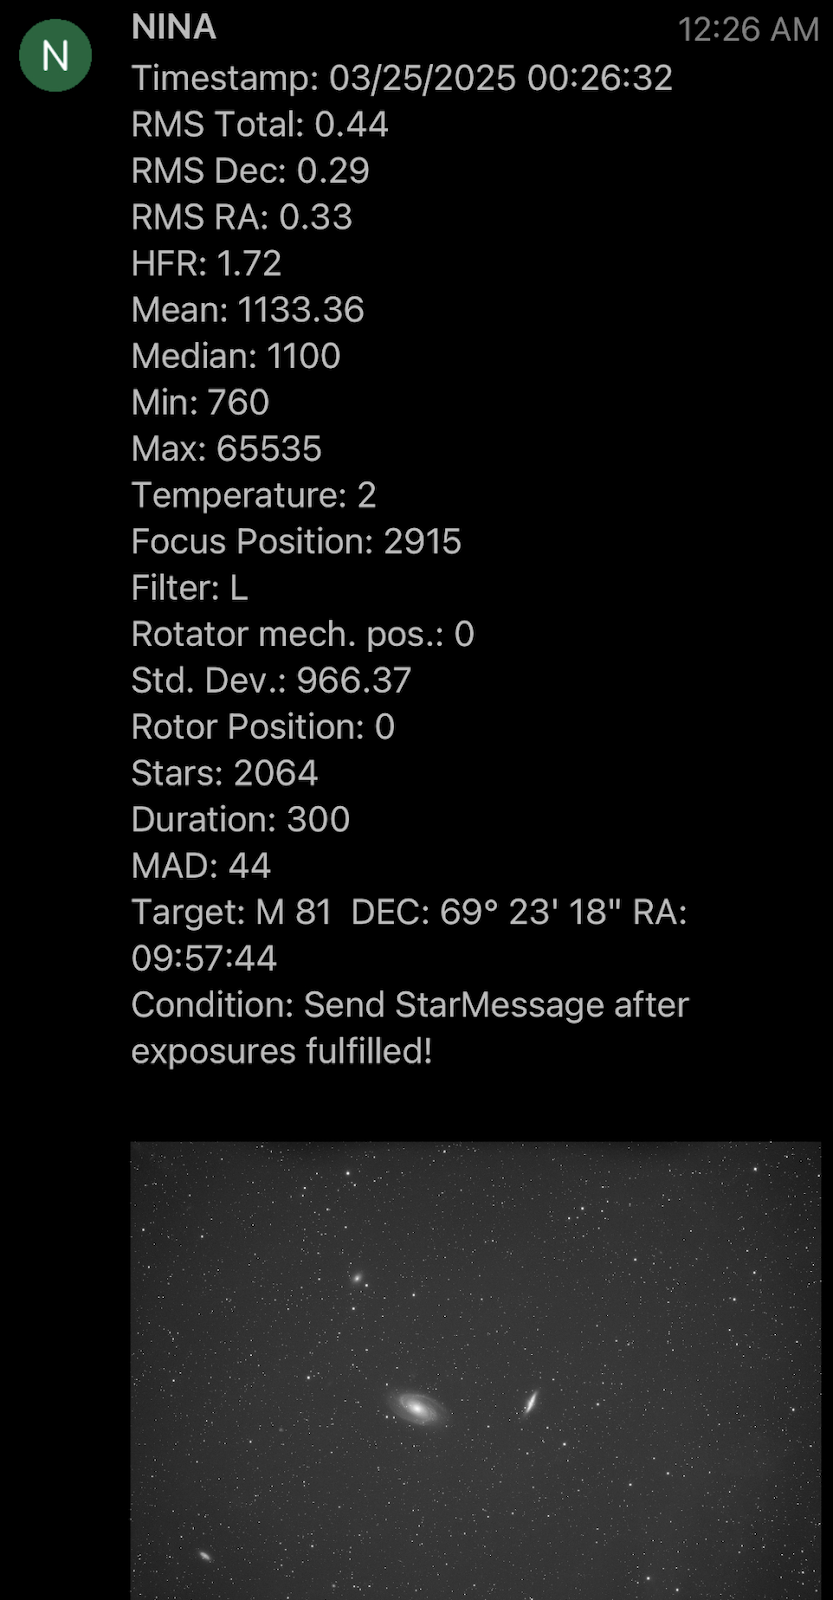
Now anytime you have your phone, you can see your RMS, filter, star number, exposure length and much more. In addition, having a preview of the image lets you make sure your target is cloud free, and you don’t have any optical issues or trailed stars.
3. Lightbucket
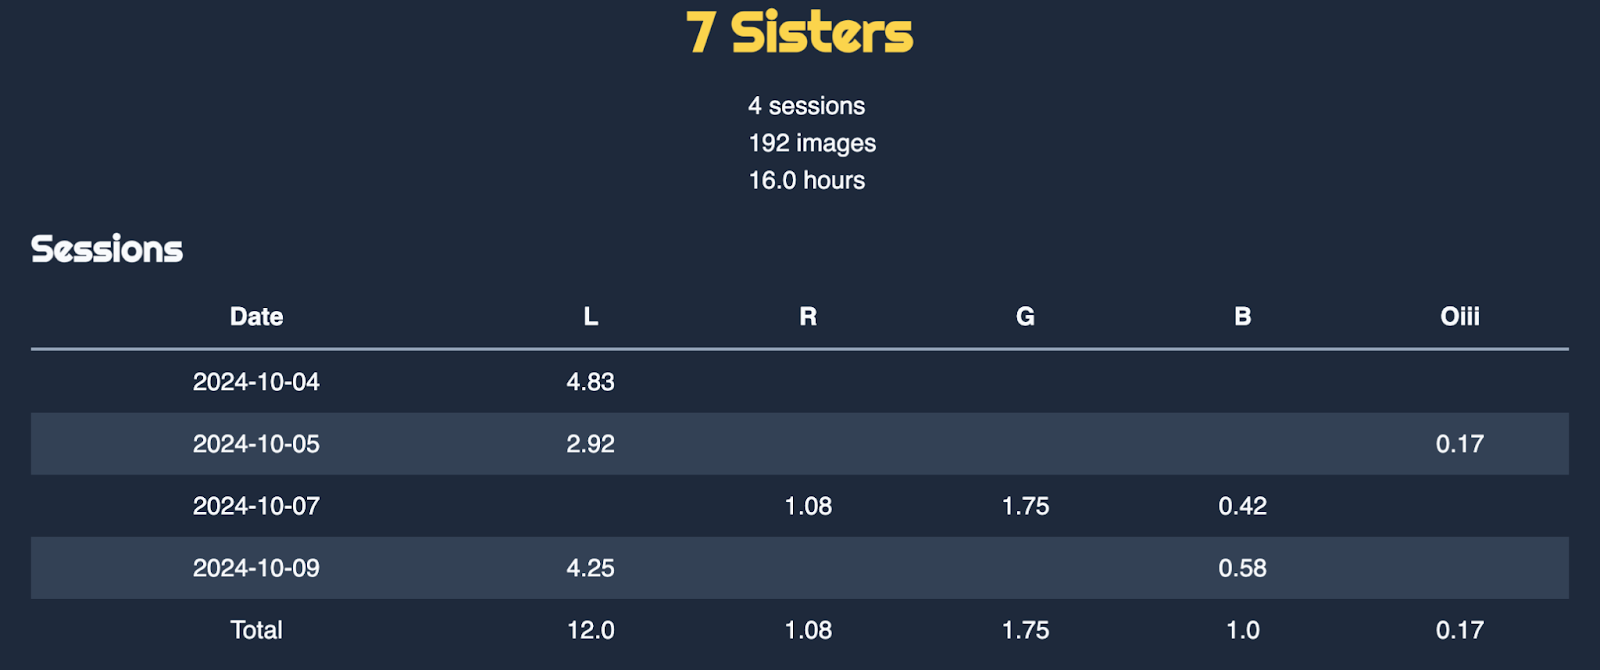
This plugin is very helpful for tracking your projects and tracking long term data. You will need to login to the Lightbucket website with a Discord account, and then using the link given on the plugin page in NINA, copy your username and API key into the text fields. Now session data will be logged to https://app.lightbucket.co/. You can see your own data along with others also using the plugin. If you are logged in, you will see your own system at the top of the page, and you will be able to monitor the progress of your session. This includes an RMS graph, latest image, and much more. Also Lightbucket keeps track of all your projects and how much time you have in each filter. For example:
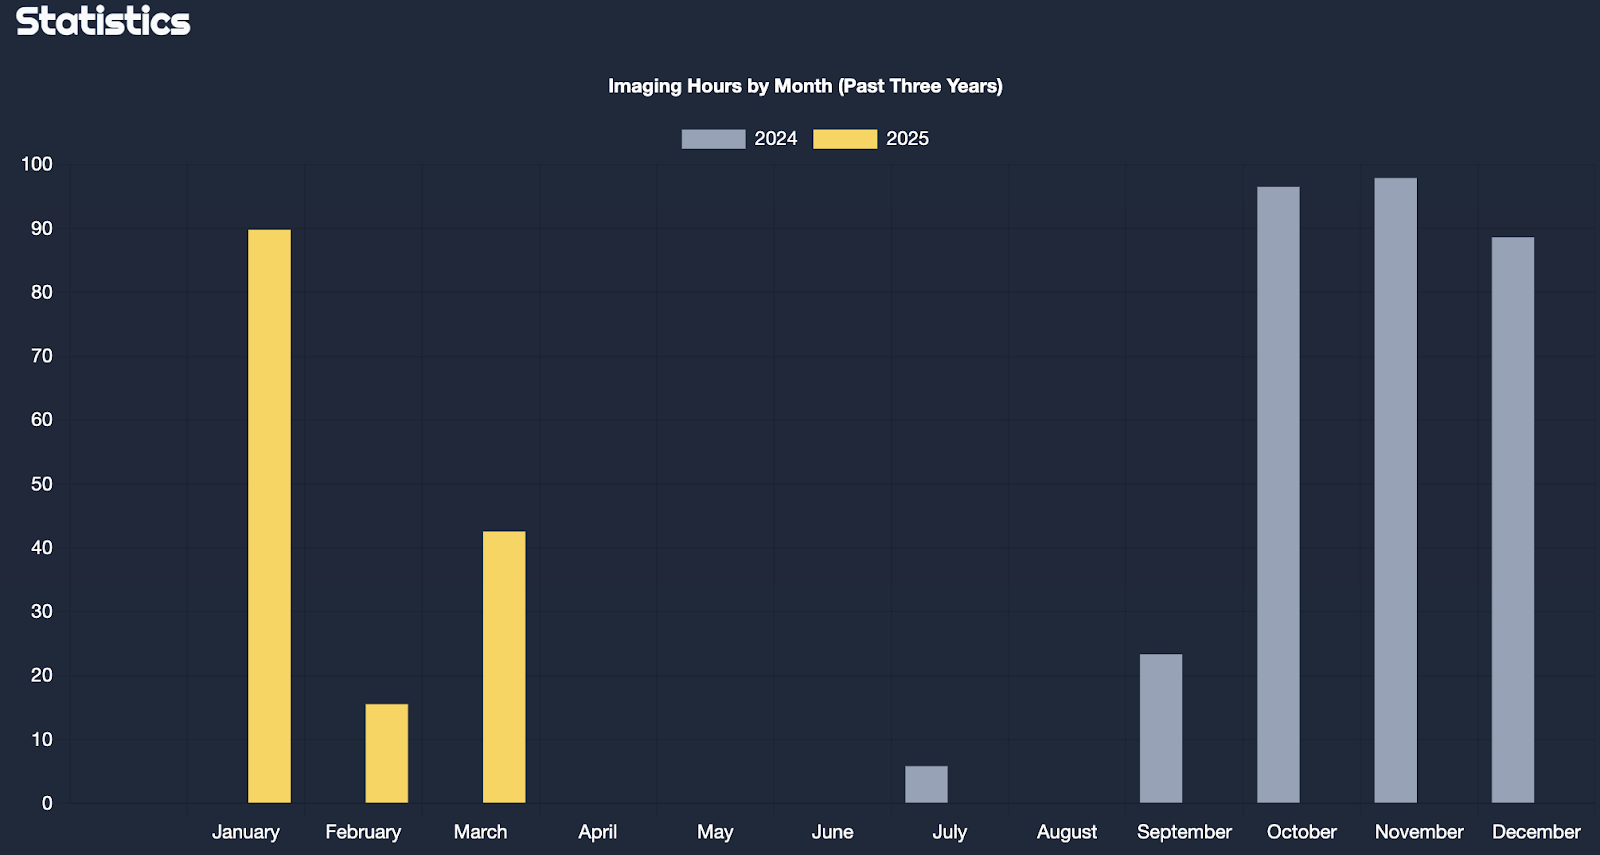
In addition it also logs total imaging time by month, letting you see how much time you get under the dark UDRO skies:
Hopefully these plugins can help you sleep a bit easier at night, and track any data point you want over the course of the night and year!