By Jett Peters
Stacking is one of the most important processes in astrophotography. It allows us to image faint nebulae and galaxies for as long as we want and significantly increases our signal to noise ratio. Today, I would like to go over one of the best tools for stacking astrophotography data: Weighted Batch Preprocessing in PixInsight (WBPP). Calling WBPP a stacking tool is underselling it a bit, however, as WBPP—as the name suggests—can do all the preprocessing you would conventionally do with a number of different programs or tools. WBPP performs all of the following tasks in one simple and efficient tool: calibration, registration, frame rejection, weighting, integration, drizzling, and cropping out stacking artifacts.
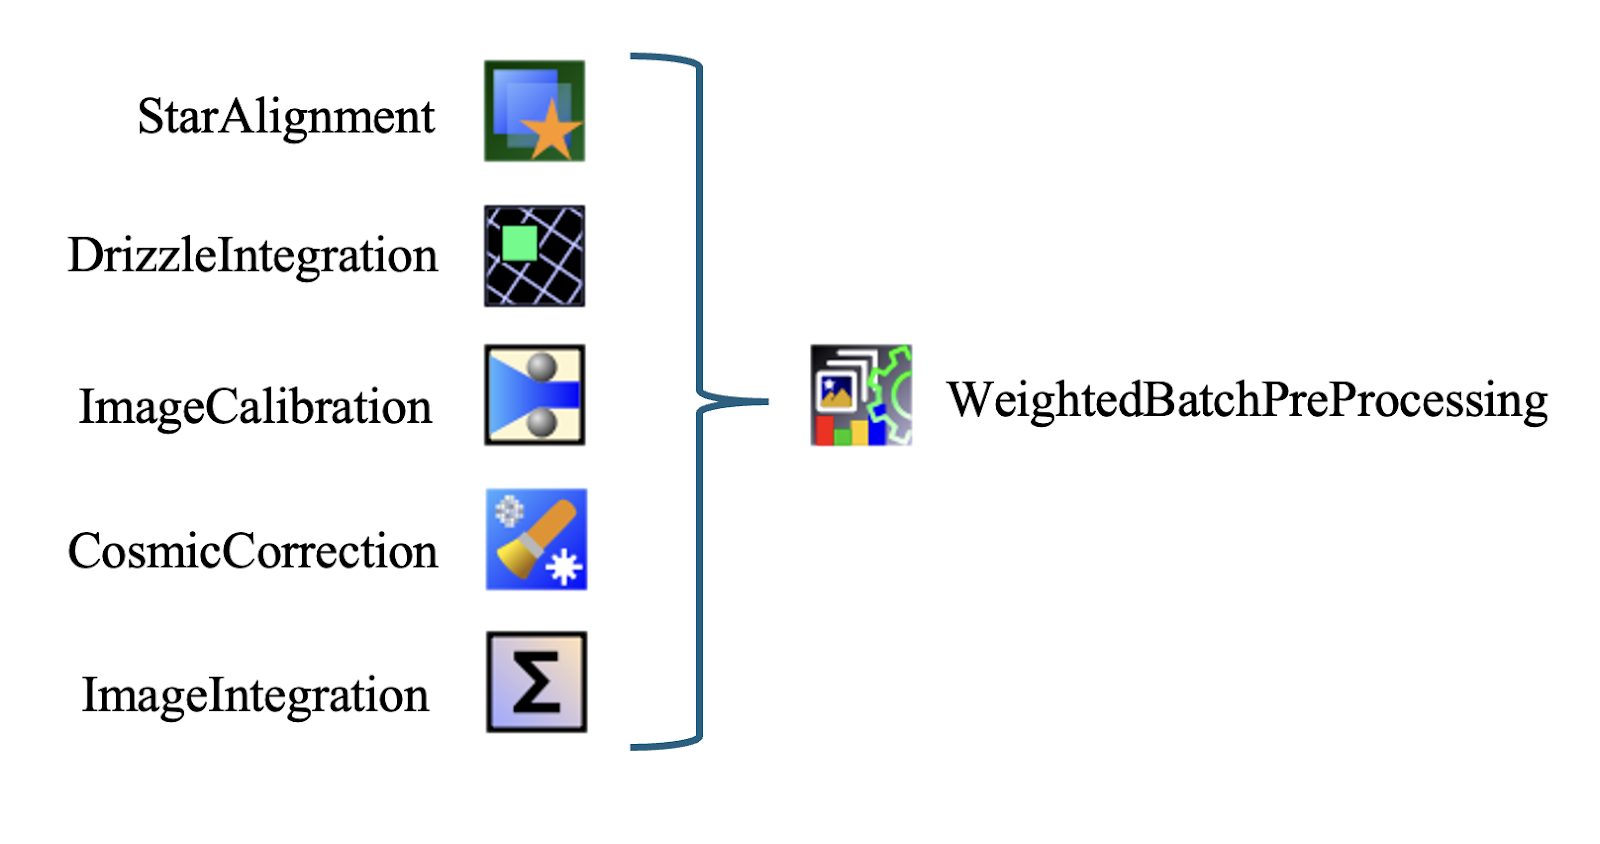
Many tools commonly used by astrophotographers to accomplish these tasks, such as DeepSkyStacker, Siril, and the individual tools in PixInsight, can perform only a few tasks each. This means you often have to use multiple tools or processes. WBPP streamlines this process.
First, let’s go through each of the tasks WBPP accomplishes—staying very general—and then dive into some useful tips and settings.
Calibration
WBPP allows for the calibration of light frames with darks, flats, and bias frames. Most of us are familiar with what these are and why they are important, but I will still give a brief summary. Darks help to reduce noise in the light frames and remove amp glow. With today’s modern CMOS chips, dark frames are pretty much obsolete. Flats are taken with a uniform light source in front of the telescope objective, and they remove dust and vignetting from the light frames. Bias frames are taken with the dust cap on at the lowest exposure length possible. After adding all your desired calibration frames to WBPP, the tool will stack these to create master frames. These are used to calibrate the light frames.
Frame Rejection
As you might expect, frame rejection is a straightforward process. WBPP will reject any frames with glaring issues by default.
Weighting
This is, in my opinion, one of the coolest parts of WBPP. By default, WBPP will use “PSF Signal Weight.” This method weighs images based on sharpness. Over the course of many nights, you will have some images that are very sharp (low FWHM) and some that are very poor (high FWHM). PSF Signal Weight gives higher priority to sharper frames during stacking, effectively replacing the need to manually inspect and reject poor frames.
Registration
This is the mundane process of aligning images. WBPP will align all filters, so there is no need to align stacks after running WBPP.
Integration
Image integration, another term for stacking, is the core of the process. In addition to stacking, WBPP performs pixel rejection to ensure a clean stack.
Drizzling
Drizzling is a process of upscaling an image. Originally developed by NASA for the Hubble Space Telescope, it is a great way to improve the resolution of your images. While it can sometimes be detrimental in terms of signal, it can massively enhance resolution.
Auto Crop
Auto Crop in WBPP performs a simple task but can remove a step from your workflow. After stacking a large amount of data, stacking artifacts begin to appear, usually at the edges of the image. WBPP crops them out automatically.
WBPP Tips
Exposure Tolerance: This is a small box under “Post-Calibration” that allows for multiple exposure lengths to be stacked. By default, if you load a few 300-second exposures and a few 600-second exposures, WBPP would separate them and give you two stacks. This is likely not what you want. Set the exposure tolerance to 300, and you should get one stack of both 300 and 600-second subs.

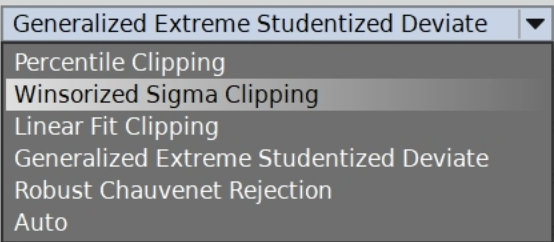
Pixel Rejection: This is the process during image integration in PixInsight where dark pixels (those with no signal) and hot pixels are removed from the master light frame. By default, this rejection is set to auto, but it’s recommended to change it to “Winsorized Sigma Clipping” or “Generalized Extreme Studentized Deviate” (GESD), as these are more effective rejection algorithms. You can make this adjustment by going to “Integration Parameters” under the Lights header. Winsorized Sigma Clipping is particularly good for rejecting artifacts like airplanes when you have a limited number of frames. GESD is also effective but works best when the frames are clean. Before stacking your frames, you might want to review your data using the “Blink” tool. For continuity, the blink tool is a PixInsight tool that allows you to loop through your data, and make sure that there are no frames you don’t want.

Calibration Flow Diagram:
Sometimes WBPP may not complete the calibration steps correctly, or there may be issues during calibration. For instance, WBPP might not recognize the correct frames or could be using the wrong filter’s flat frames. To ensure everything is proceeding as planned, open the “Calibration Diagram.”
Under the Calibration tab, if you select your light frames or other calibration frames, a “Show Calibration Diagram” option will appear in the right menu. Clicking this will display a flow chart similar to the one below.
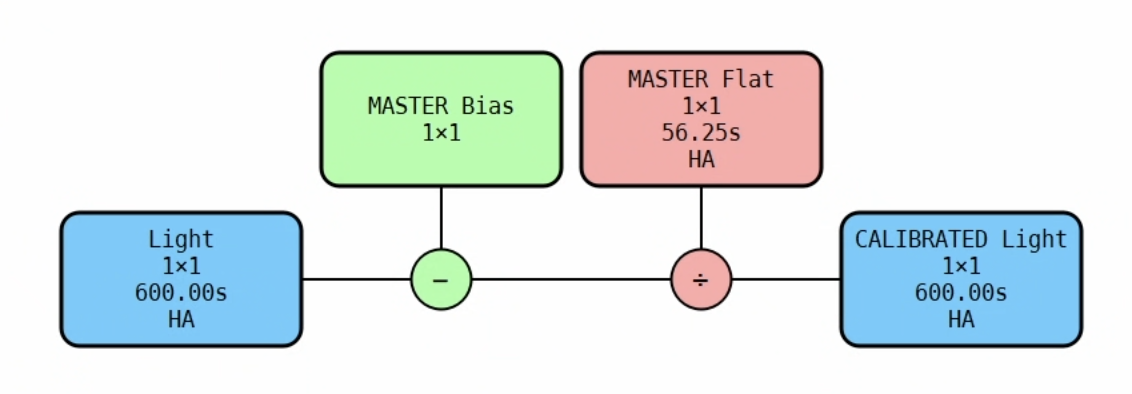
As you can see, the master bias is used to calibrate the master flat, which, in turn, calibrates the light frames. This is the correct configuration for modern cameras that don’t require dark frames.
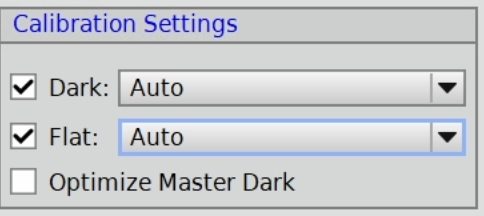
If the filter is incorrect—for example, if the OIII master flat is calibrating the HA light frames—you can easily change it. Simply click on the light frames and go to the Calibration settings in the right menu. From there, you can choose the appropriate master flat to calibrate your light frames. WBPP should not make this mistake, but it can happen if you label the filter incorrectly.