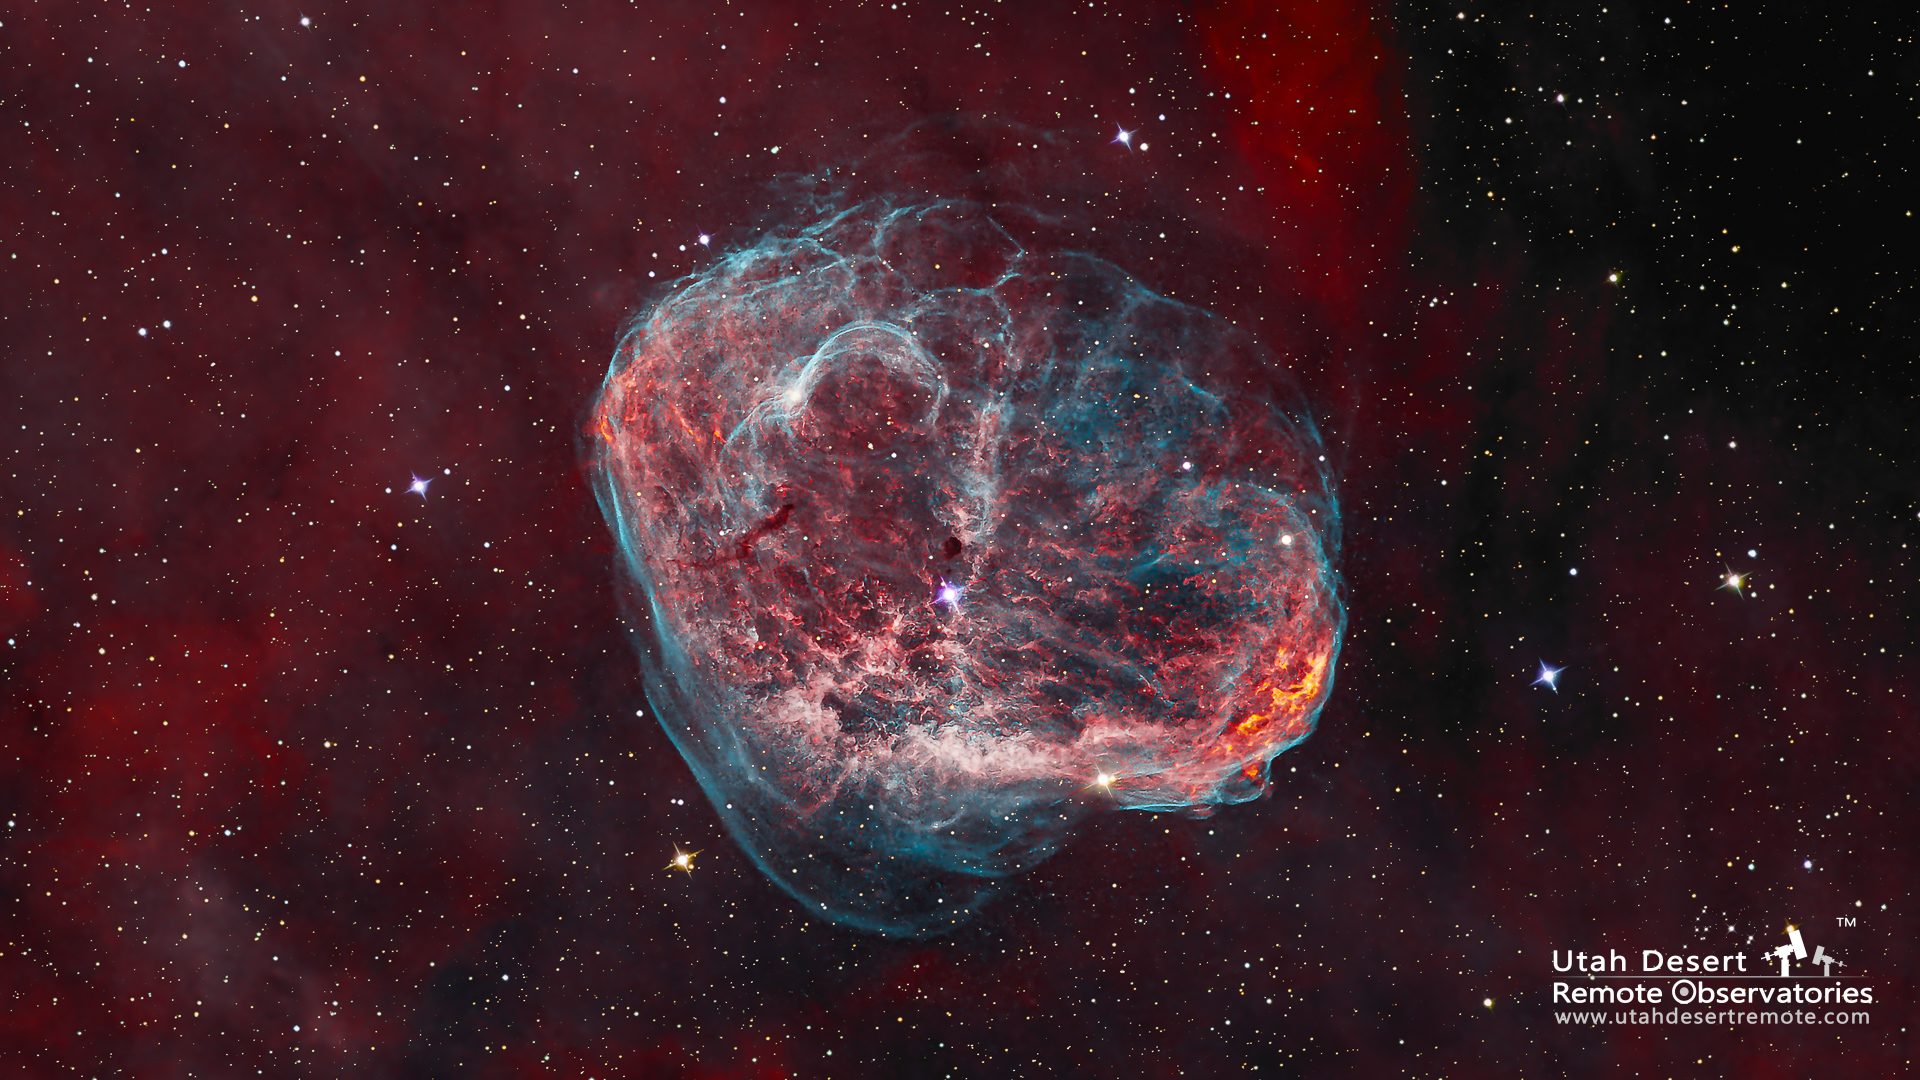
Creating an astro photo is much more of a process than an event. We spend quite a bit of time capturing images of details that are so dark they are nearly invisible, then spend hours processing the images to create a final result. These two images of the Crescent Nebula are a good illustration of why we spend the time.
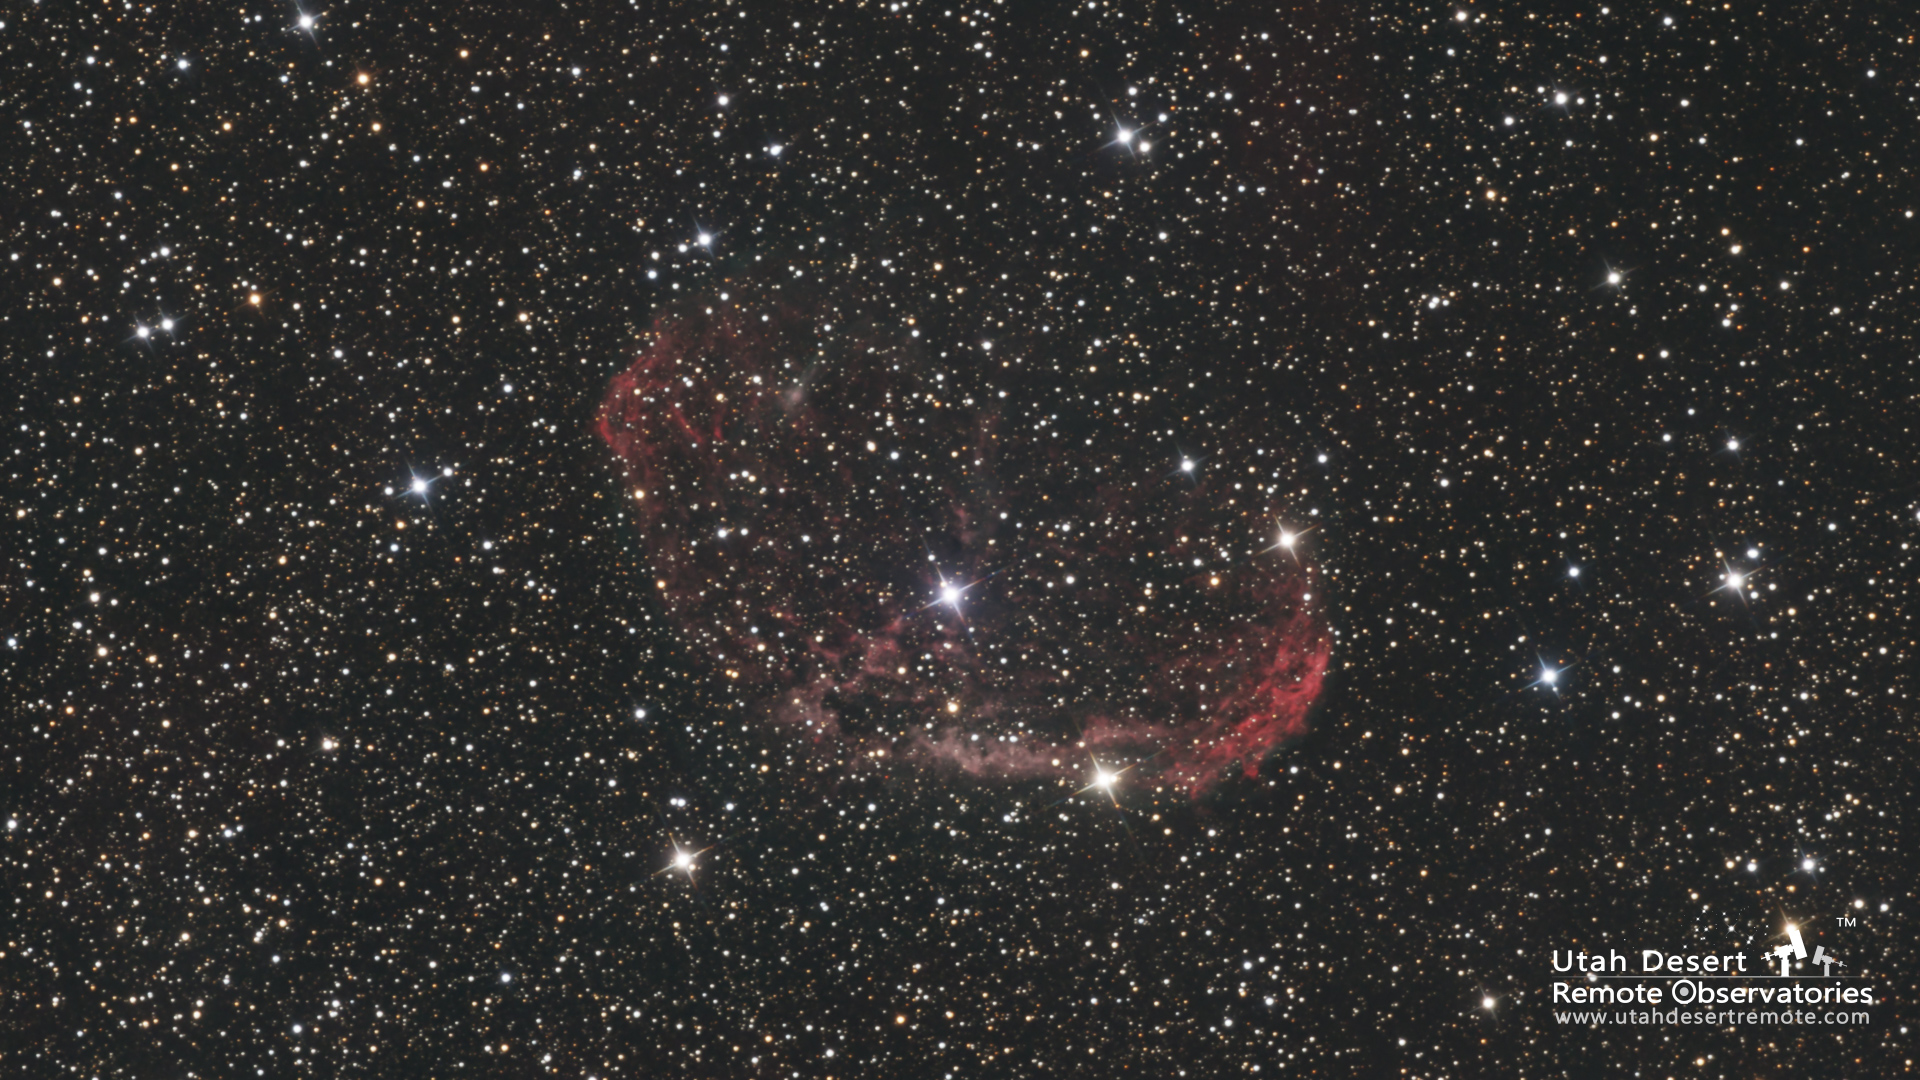
The “before” image above shows a typical color photo of the Crescent Nebula. It was captured with a minimum amount of time (about 30 minutes) and has only the basic processing steps needed to create a well balanced color image. This is a “broadband” image since it captures the broad range of visible colors from red to blue. For the most part, all you can see are the stars and the details of the nebula are mostly hidden.
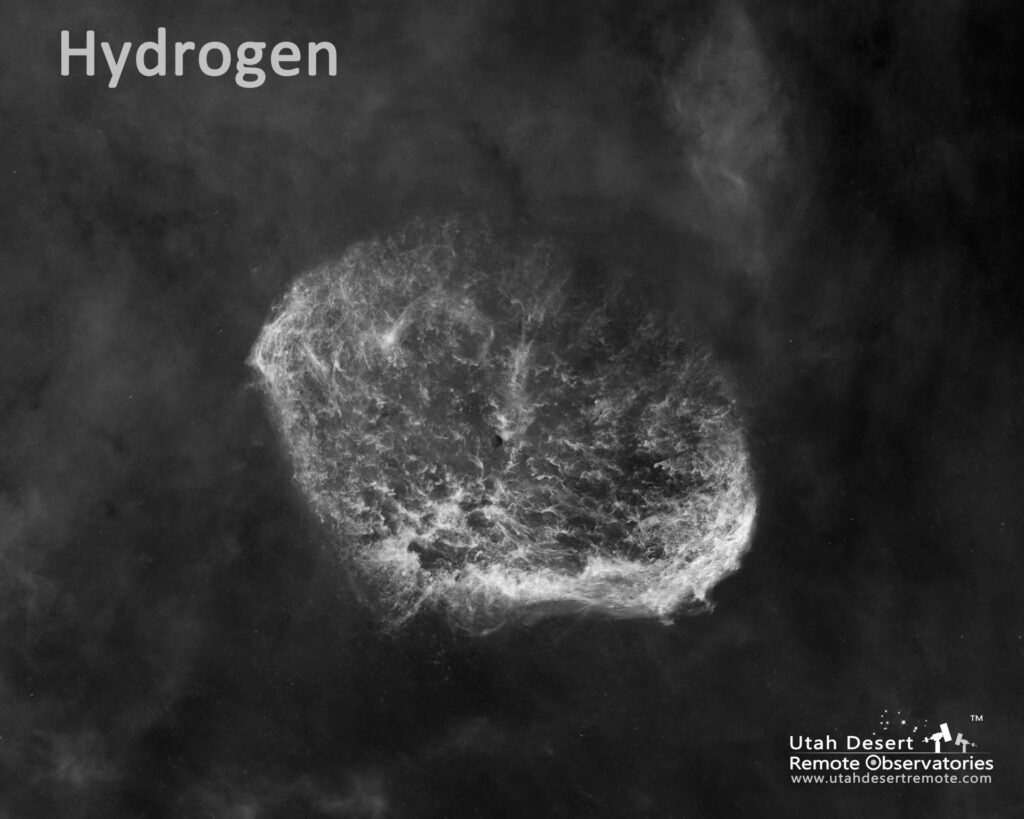
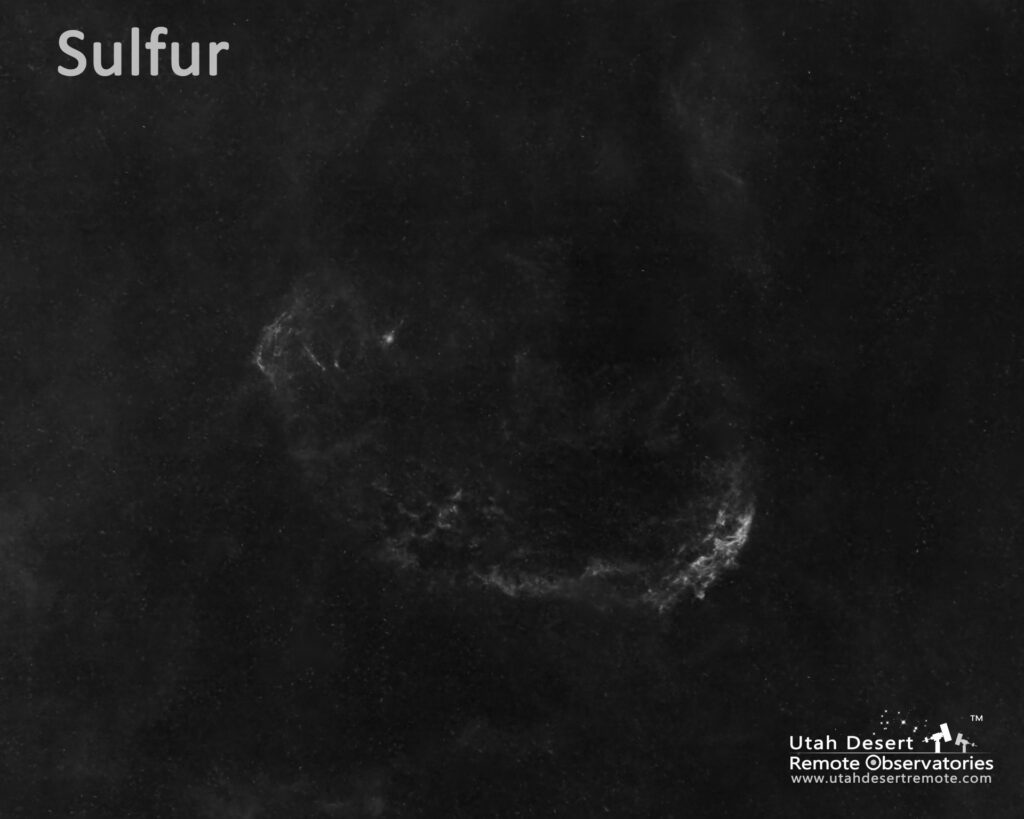
The “after” image shows a typical result using narrowband imaging techniques and more extensive post processing. It was captured over 11 hours on three different nights using special narrowband filters that only allow very specific colors of light to be exposed. The gases glow in the same way a neon light glows. It’s call a narrowband image since each element was captured using a special filter that only sees the very narrow band of color emitted by that element. Hydrogen emits a deep red color, sulfur also emits a slightly different red color and oxygen emits a blue/green color of light.
Pictured below are the results of the three sets of images for each element. The stars have been removed at this point in the processing so that we can focus on just the nebula.
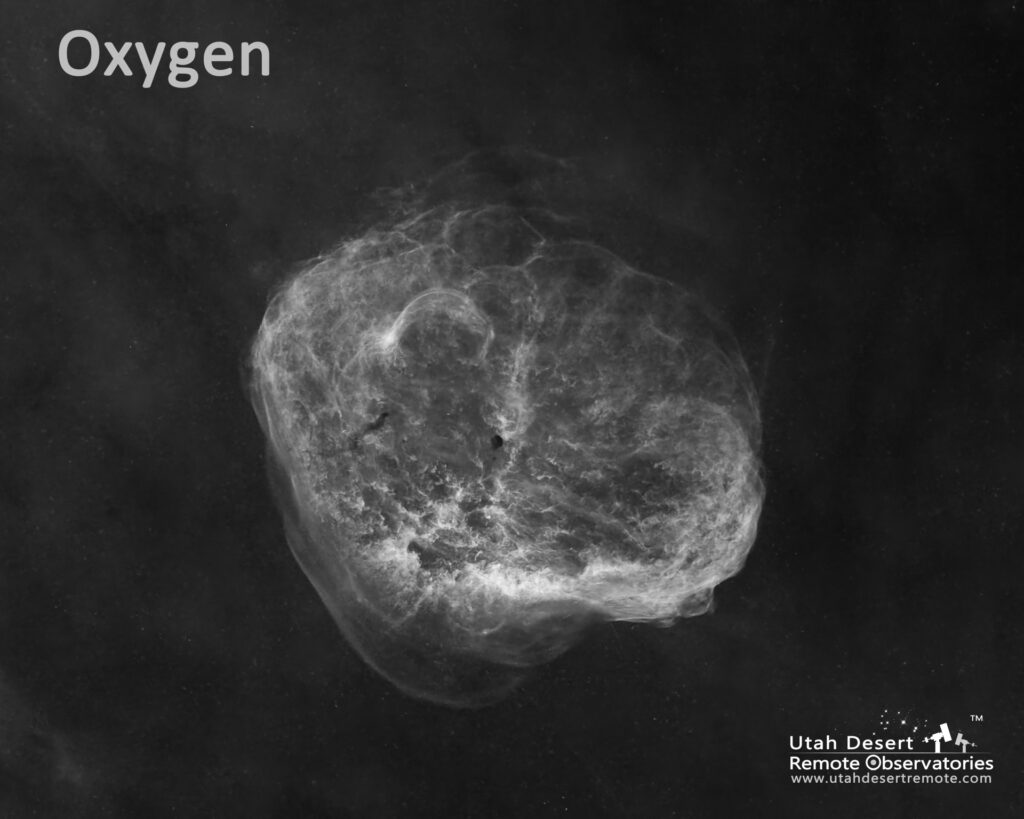
Processing a narrowband image can be much more complicated than a simple broadband image. In my process I create three individual images, one for each of the elements. I then remove the stars so I can optimize each image by itself. Once each element has been optimized I use Photoshop to color map the elements. In this example I mapped hydrogen to red, sulfur to yellow and oxygen to blue/green to create a fairly true-to-life color image – but with a lot more detail that a simple broadband photo. The last step is to add back the stars and star colors to create a final narrowband image.
If you’d like to learn more about processing a narrowband image be sure to check out the video below.