I approach astrophotography as a form of fine art – meaning that my main motivation is aesthetics rather than scientific accuracy. However I limit my edits to primarily two aspects of the image, color mapping and star size.


Star size – I use specialized editing tools to move just the stars to their own layer in Photoshop. That lets me adjust the brightness, contrast and color balance of the surrounding nebulae independently from the stars. It also lets me reduce the size of the stars so that they add some seasoning to the image but don’t overpower the nebula.
Color mapping – Generally I’m photographing things we can’t see and can barely photograph using a typical camera. I use special glass filters to isolate individual gases with hydrogen being the most common element in the universe. Oxygen and sulfur are also very common gases. When I combine all of the image data including stars and gases I get to decide how to color map the gases so that the result is both pleasing and informative.
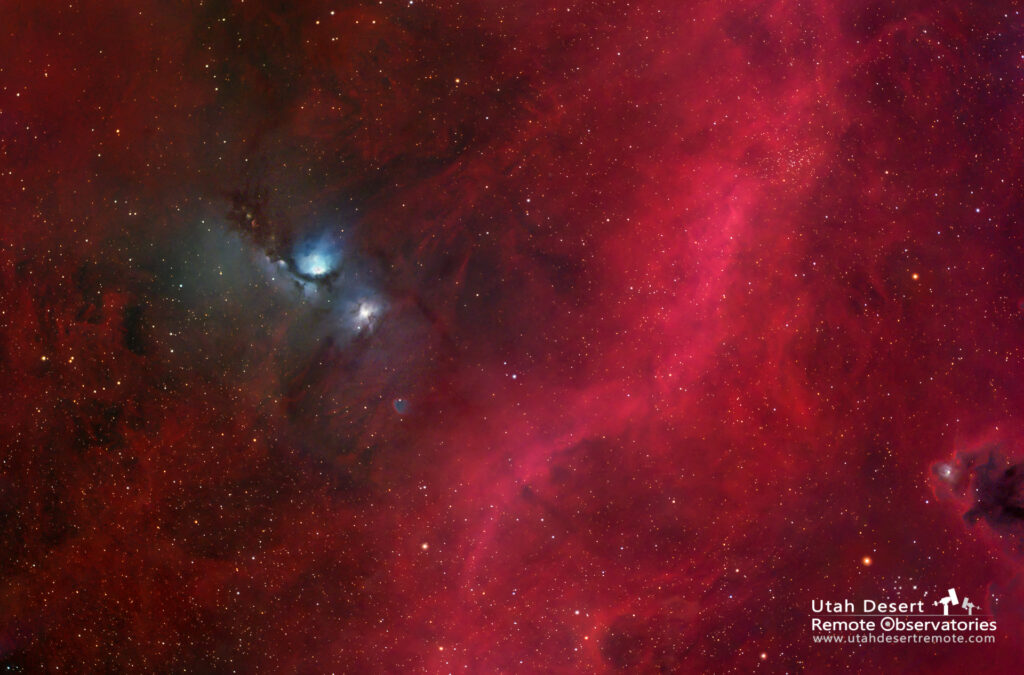
Want to know more? check out this short 16 minute video explaining how I captured and processed the image of M78 and its surrounding cloud of ionized hydrogen gas.
The two examples here show two approaches. The one that is predominantly red is an HaRGB image meaning that the base image is a simple color image but then I added additional information taken with a hydrogen filter. Since hydrogen glows in a specific red color I choose to let it be red.
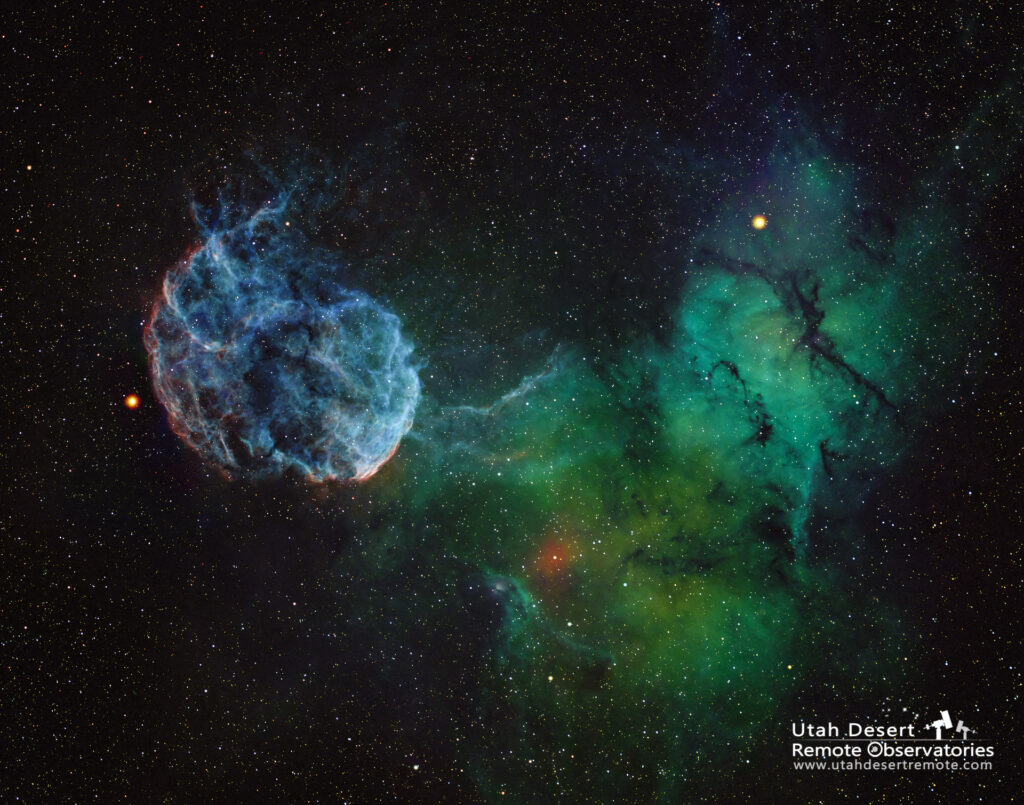
The second image uses a different color scheme to maximize the color contrast between the various gases. In this case I chose to map oxygen, hydrogen and sulfur to red, green and blue respectively so hydrogen ends up as green. Once you know the color mapping scheme you can identify where the various gases are most heavily concentrated.
There’s really no right or wrong, just different choices in an attempt to create something attractive and interesting to look at.
Imaged from Utah Desert Remote Observatories using the Takahashi FSQ106 on a Paramount MX+ with a ZWO ASI6200MM Pro camera.
