By Jett Peters
In astrophotography we are all after more automation. Automation means more sleep, which we all need in this hobby, and better quality data in the morning. There are many elements of automating an astrophotography rig, but today I would like to talk about one specific aspect of automation that will let you sleep easy, knowing your rig will park itself if conditions go awry. This device is the safety monitor, and today we will discuss how to set up the “Generic File Safety Monitor” with NINA. The safety monitor will tell your setup when the roof is open or closed. By integrating it into a NINA sequence, we can make our telescope stop and start imaging depending on the roof status. We are focusing on the Generic File Safety Monitor and how it interfaces with the remote observatories roof status, as this is the way its done here at UDRO, and most remote observatories will use a similar method.
First let’s discuss how to integrate the “Generic File Safety Monitor” with NINA, and then we will talk about the best ways to use it in a sequence to get the most out of your nights. Begin by installing the Generic File Safety Monitor driver at this link. Once it’s installed on your computer, open NINA and navigate to the safety monitor section on the equipment tab. Click the dropdown menu, just like you would for any other device, and you should see “Generic File SafetyMonitor.” Click this, but do not connect it just yet. Click the gears to configure the safety monitor. This should bring up the following dialogue box.

We want to fill this out, and then click add. Select “Unsafe” from the “Event type” drop down menu. In the “File to monitor” you will need to copy the path of the roof file. This is going to be somewhere on the observatory’s network (you may need to ask the observatory managers for the exact location). Next take a look at this file and figure out what the “Trigger preamble” and “Trigger” should be. In the case of UDRO, the “Trigger preamble” is going to be “Roof,” and the “Trigger” should be “CLOSED” in all caps (we could also do “Safe” and “OPEN”). The “Monitor interval” tells the safety monitor how often to look at the roof file (I selected 0.16). This is what the filled out dialog box should look like.
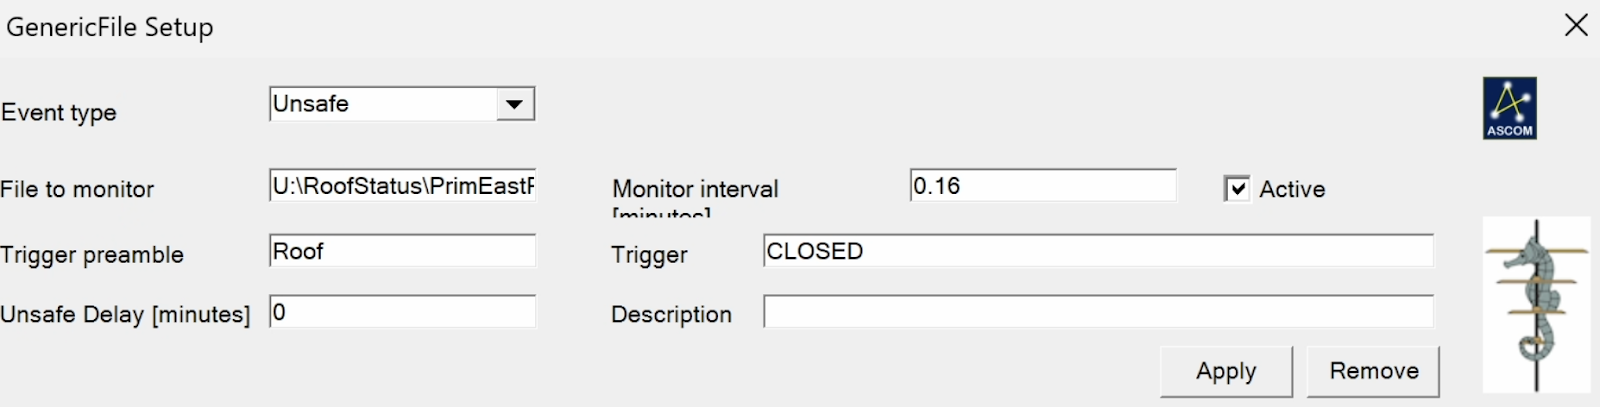
UDRO roof file example:

Next simply click add. Now that we have configured the safety monitor, we can connect the device. When the roof is closed, the condition will be set to unsafe, and when the roof is open the condition is safe.
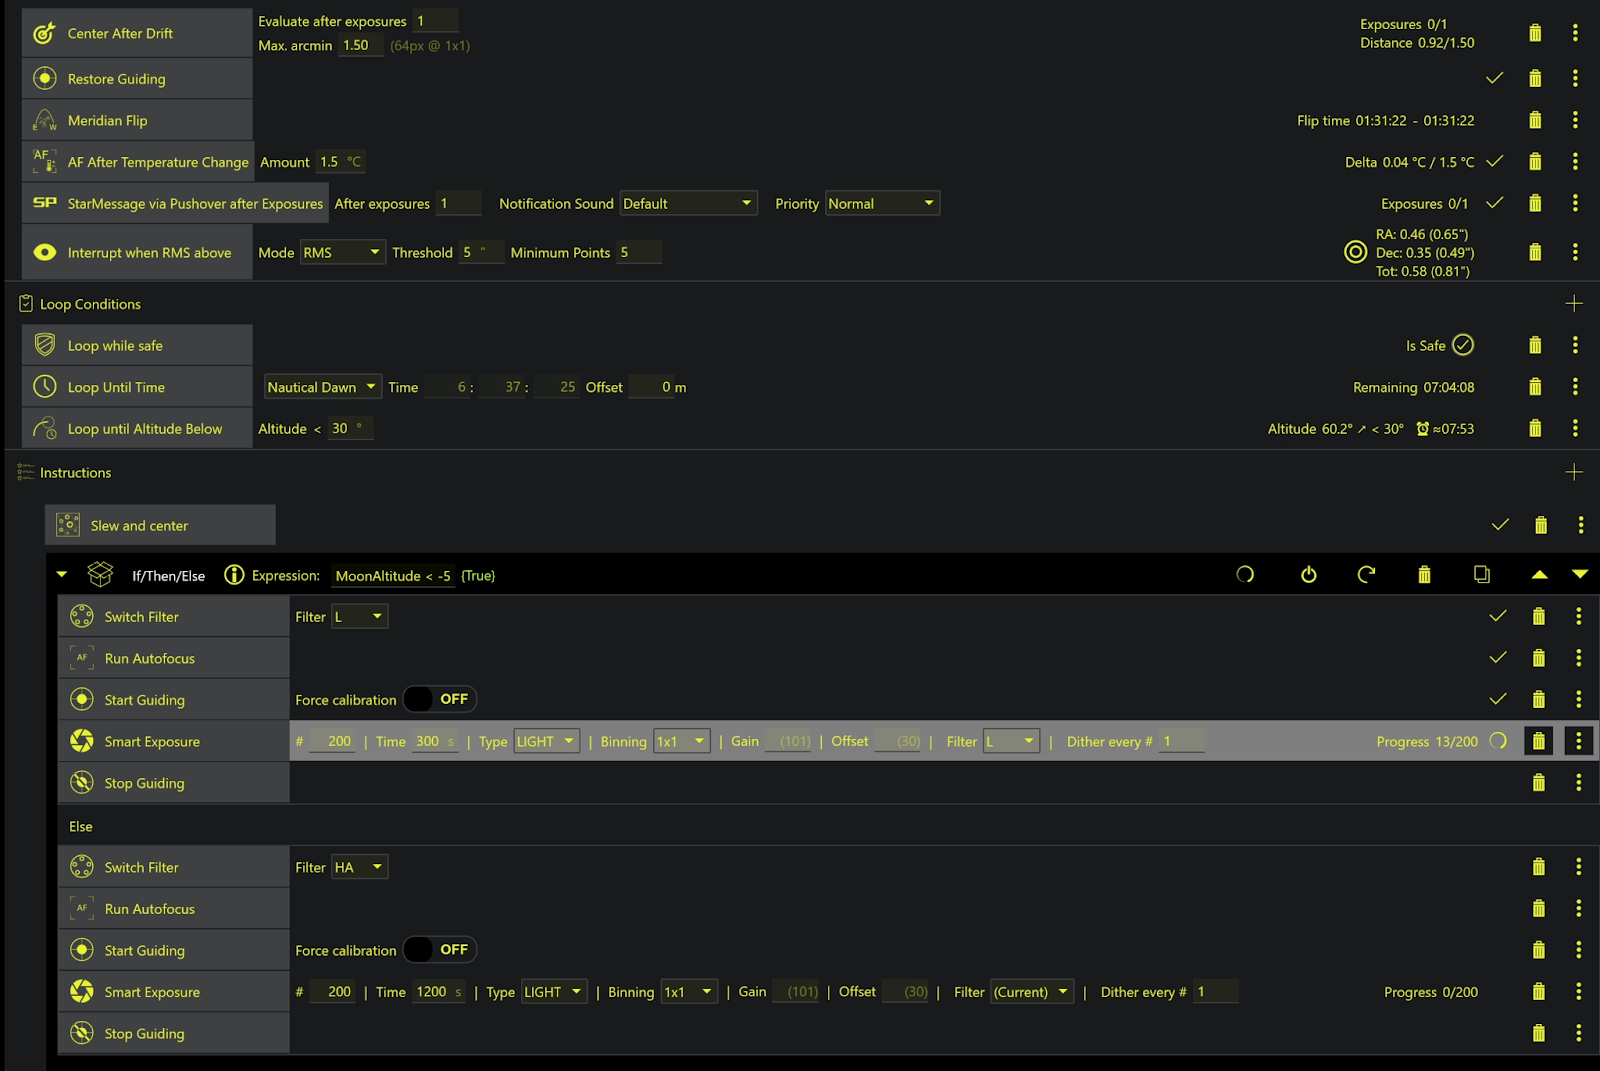
The safety monitor alone is a good reference, but in order to be able to utilize it, we need to integrate it into our NINA sequence. There are two main ways we do this: loop conditions and wait statements. The loop while safe condition is pretty self-explanatory. This loop condition will loop until the safety monitor reads unsafe. This is perfect to add to your set of loop conditions for the imaging run. I use: loop until time, loop while safe, and loop until below altitude. Adding the loop while safe ensures that if the observatory roof closes, your telescope will not continue imaging. Loop while unsafe is also a loop condition in NINA, but it is less useful. An imaging run sequence element using a loop while safe condition can be seen below.
In addition to loop conditions, NINA includes an instruction called, “wait until safe.” This is useful for the start of the sequence. If we put this at the very start, we can make the sequence wait until the observatory’s roof is open. This can be useful if you want to make a sequence that will loop continuously, but will only truly start when the roof is open. Also, adding a “wait until safe” along with the loop conditions we have discussed, can allow the telescope to image, park when the roof closes, and then start imaging again when the roof opens. This allows us to get the most out of the night even if there are intermittent clouds and the roof closes (maybe more than once).